Draw a two-point perspective box, then check one edge
Start with a horizon, two vanishing points and one upright corner. Draw the box, then extend its existing edges to check whether each family agrees on a point. The illustrated exercise below separates an inconsistent edge from a consistent box that simply has strong perspective. You need paper, a pencil and a ruler; an assistant is optional.
Construct the first box
Draw a horizontal horizon line and mark two points, L and R, well apart. Between them, draw a vertical segment below the horizon: A at the top and B at the bottom. This is the nearest corner. Draw light guide lines from both A and B to L, and from both A and B to R.
Choose one vertical line to the left of A–B and one to its right. Stop each where it meets the corresponding upper and lower guides; these become the far edges of the left and right faces. To close the top, connect the upper left corner toward R and the upper right corner toward L. Their intersection is the back corner of the top face. Darken the box edges and keep the construction lines light.
This constructs a box, not a verified cube with equal sides. The side widths you choose affect its proportions. Two on-page vanishing points can create a pronounced view; that is not automatically a mistake. This exercise keeps the upright edges vertical. A tilted box, a sloping roof or a three-point exercise uses different direction rules.
Check the line you drew, not the line you intended
Lay the ruler along an existing receding edge and extend that edge toward its intended vanishing point. Do not rotate the ruler to aim at the point: that would draw a correction and hide the mismatch you are checking. Inspect the left-going family against L and the right-going family against R separately. Leave upright edges out of those two checks.
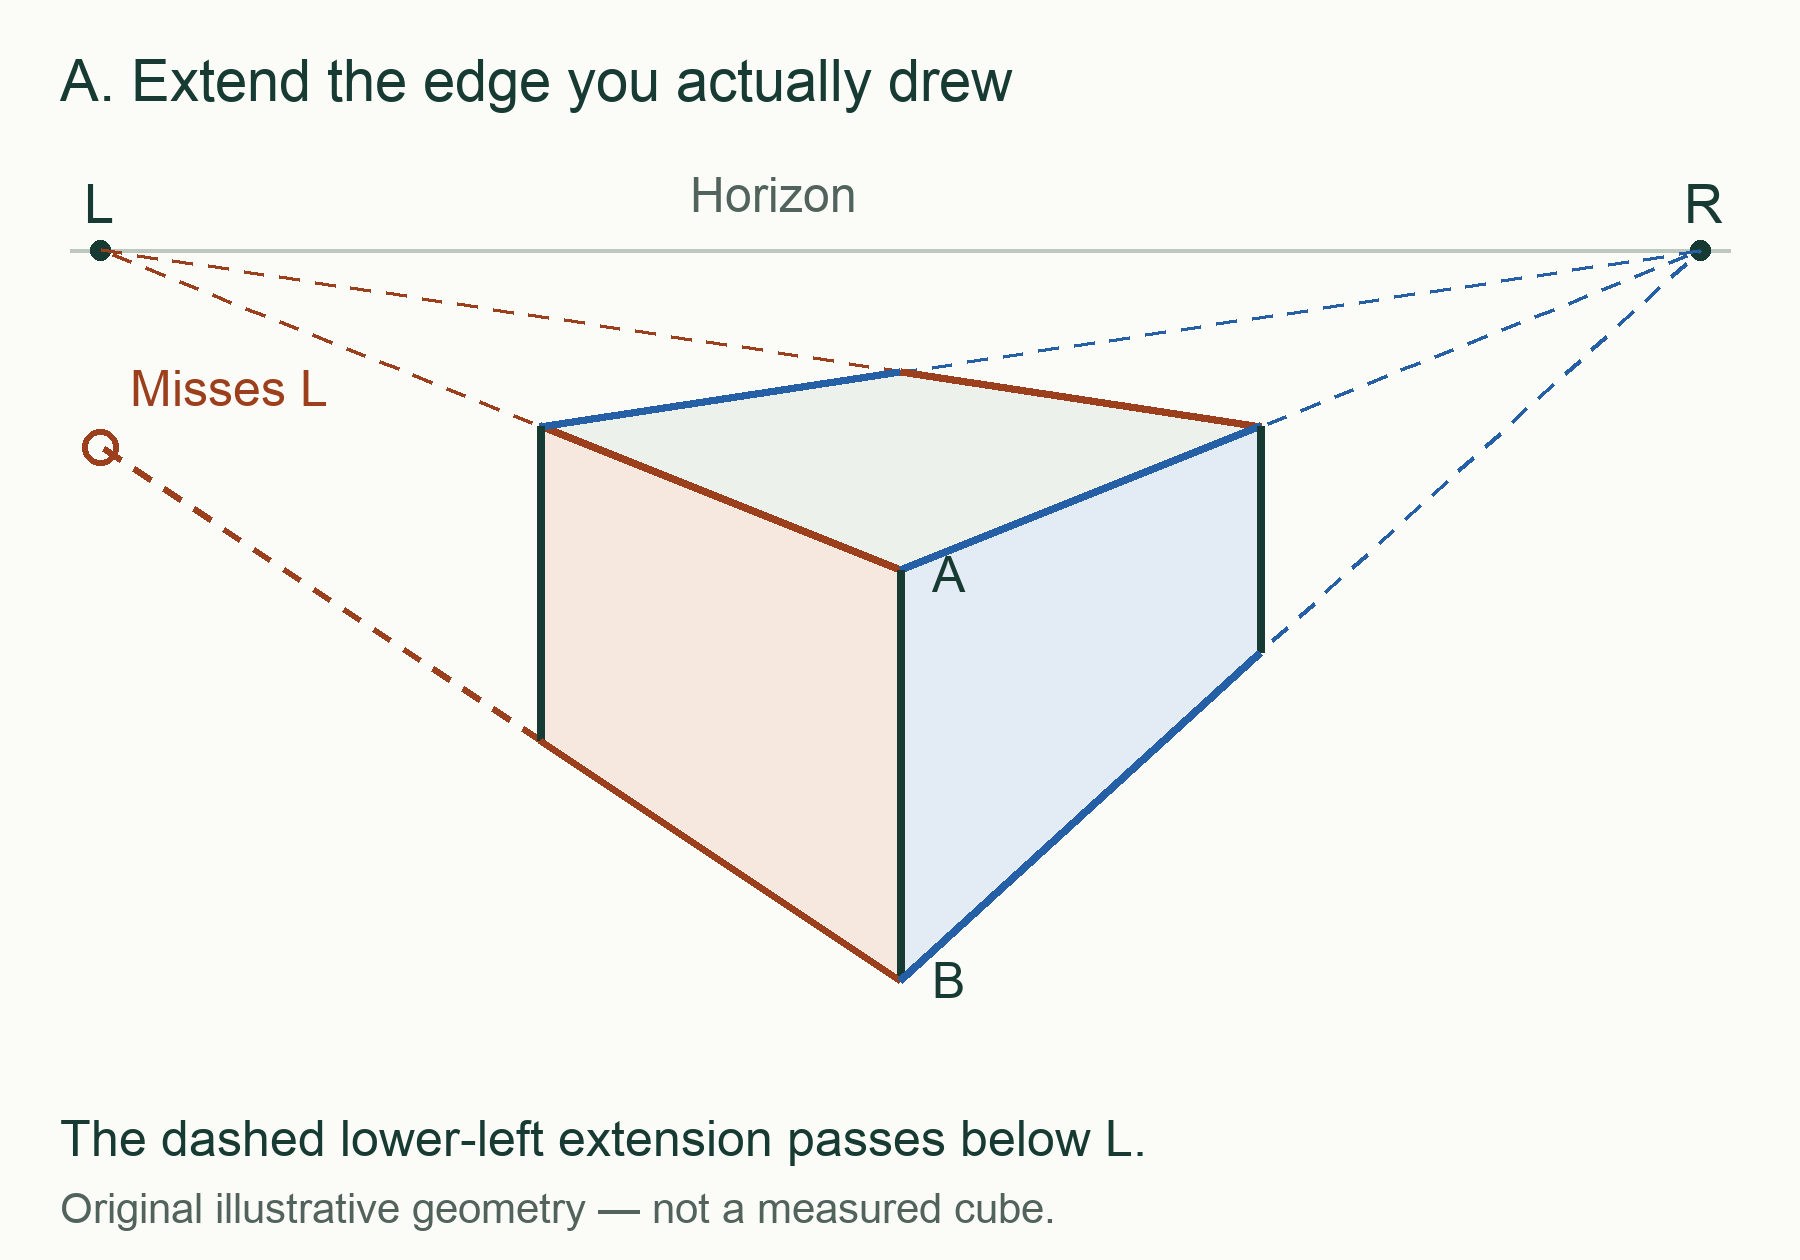
In illustration A, the upper left edge extends to L, but the dashed extension of the lower left edge passes below L. These two edges belong to the same family in this exercise. Their disagreement gives a specific next action: rebuild the lower edge from B toward L. Moving the vanishing point to rescue that one edge would break the edges that already agree.
Draw a second box using that finding
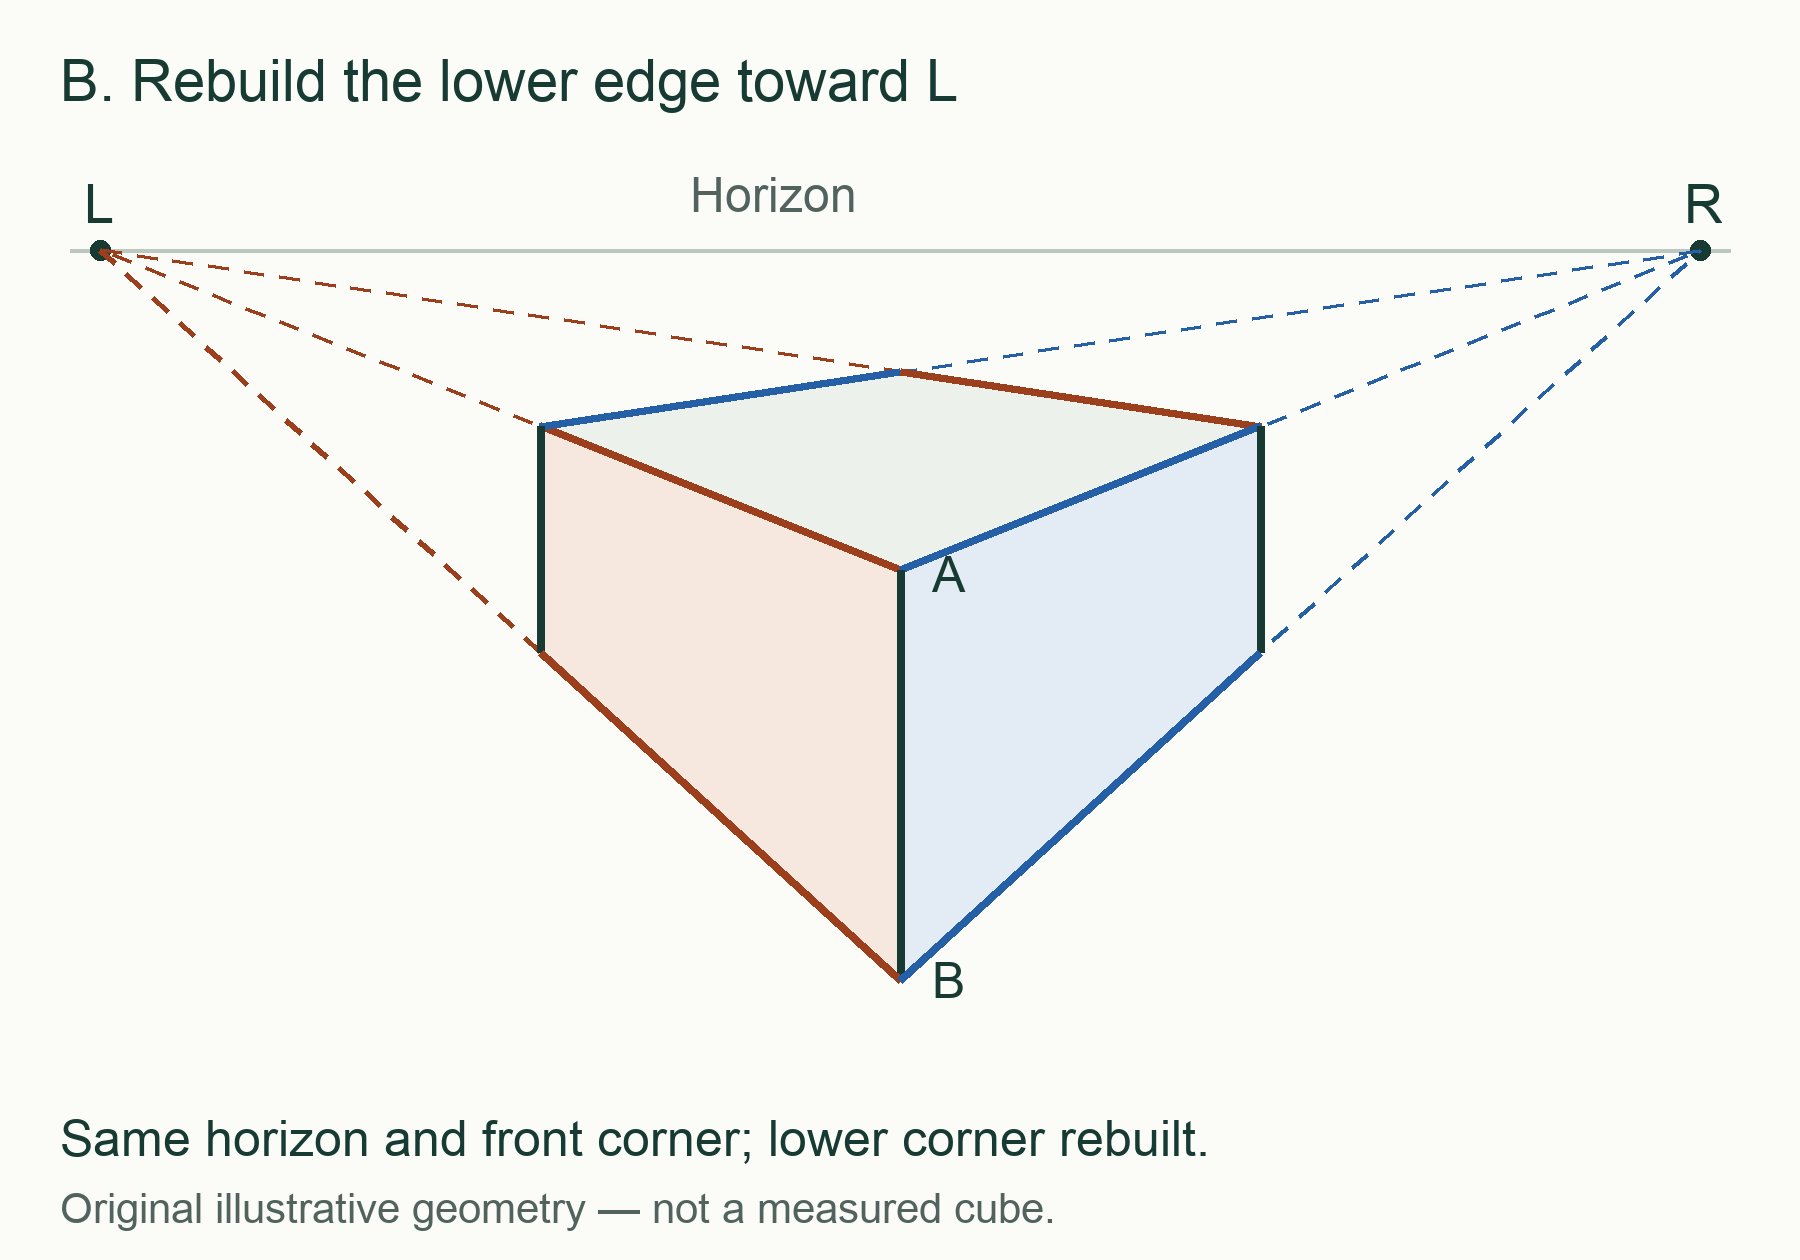
On a fresh copy or a new drawing, keep the same horizon, L, R and front corner A–B. Connect B directly to L, then stop that line where it meets the chosen left vertical. Illustration B shows the resulting lower corner. Recheck both left-going edges along their actual strokes, then check the right-going family as well.
The corrected family now agrees on L. That resolves the illustrated direction mismatch; it does not establish equal side lengths or prove this is the most suitable composition. For a transfer exercise, draw another box with a different left-face width. Predict where its lower corner will fall on the B-to-L guide, draw it, then extend the resulting edge to test your prediction.
Choose the next exercise by what the check shows
A box can have internally consistent convergence and still look more exaggerated than you wanted. If your goal is a gentler view, try another construction with the vanishing points farther apart; they may lie beyond the sheet. Compare the result rather than treating one spacing as a universal rule. Changing vanishing-point placement also changes the construction, so do not patch individual edges to simulate the new view.
Scroll the table sideways to read every column.
| What you observe | Useful next action |
|---|---|
| One same-family edge misses its intended point. | Keep the intended points. Reconstruct a fresh box from those guides, then check the actual strokes. |
| Each family agrees, but the view is stronger than your brief calls for. | Choose a gentler-view goal, change vanishing-point placement in a new construction and compare. |
| The photographed paper itself looks skewed or its straight edges bow. | Use a flat scan or a straight-on photo before attributing the apparent mismatch to the drawing. |
| The intended points or edge families are unclear. | Mark the horizon and intended L/R in the drawing before asking for a correction. |
Keep a short practice record
Goal: two-point box below the horizon
Intended L / R: marked on the drawing or extended sheet
Edge checked: [upper/lower; left/right family]
Observed extension: [meets intended point / misses / unclear]
Next construction: [one change and why]
New edge check: [result]
Still undecided: [proportions, view strength, or another question]
Ask for feedback on a readable drawing
A ruler check and a direct photo attachment are enough for one question. Keep the paper flat and the camera parallel to it; include the horizon, corner labels and any off-page guides. Ask a helper to identify the edge family before suggesting a correction. If an AI assistant cannot read a label or see an extension, clarify it instead of accepting an invented vanishing point.
If you already use LetItSee with a compatible assistant, request a still after completing the first check and another after drawing the next box. Captures are separate requests, not continuous observation. Keep the practice record yourself. An image model's judgment does not replace checking the lines with your ruler.
Prompt to adapt
I am practicing a two-point box below a horizon with intended vanishing points L and R. Use my attached drawing, or request one still if a camera source is already connected. Confirm that the horizon, labels and relevant existing edges are visible. Ask me which edge family I am checking and what I predict its extension will show. Give one hint, then wait while I use a ruler and draw a new box. After I supply the next image, compare that edge check. Do not infer hidden vanishing points, exact 3D dimensions, or equal side lengths from the image.
Source documentation
Set up without starting a capture
Set up your MCP client with the full tool reference. The separate capture page can replace the active capture page for your account. It does not take a photo by itself.